How to Build a Rain Garden to Capture Runoff

Learn how to build a rain garden that captures rainwater runoff from hard surfaces, such as a roof or pavement, for irrigation or to reduce water pollution.

This page may contain affiliate links. Please read my disclosure for more info.
Why build a rain garden?
When Mr. TAF and I moved into our first house, we were excited to transform our yard into a garden. One of our first goals was to reduce our home’s stormwater runoff. That’s because stormwater runoff is a leading cause of water pollution in the United States.
I had recently learned that runoff from our roof picks up bird droppings, dirt, bacteria and air pollutants and sends them into the storm drain, which empties directly into the local watershed.
Not good! Especially when there are simple strategies, like a rain garden, that can capture the runoff, filter it, and turn it into a useful resource. This filtered water can irrigate a garden, support local wildlife, and replenish the local watershed.
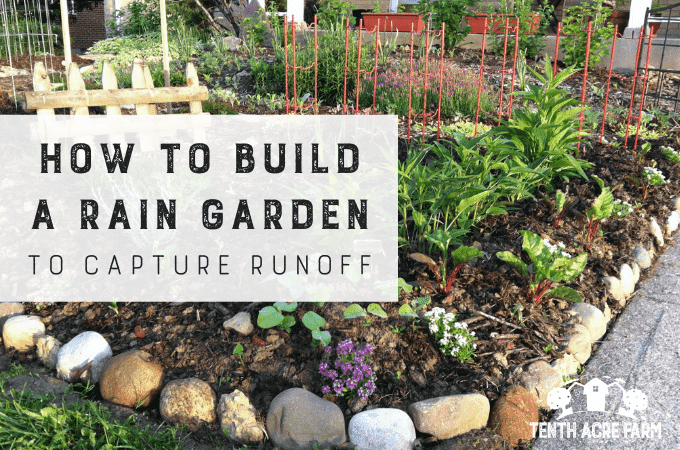
We didn’t know anything about building a rain garden back then, so we hired a local guy. He installed a pretty neat setup by our back patio, including three rain barrels.
After a couple of years, we felt more confident and redesigned the rain garden to make better use of the space. Then we went on to create a second rain garden in our front yard.
Through all three rain garden designs, I learned a lot about the process, which I’ll share with you in this article.

Rain Garden 1.0 included three rain barrels and perennial plants like yarrow, rhubarb, sage, and dogwood.
What is a rain garden, exactly?
A rain garden is a shallow depression in the ground designed to temporarily catch water from an impermeable surface such as a roof, driveway, parking lot, or even the overflow from a rain barrel.
It uses the power of gravity to collect water moving down a natural slope. A berm on the downhill side of the depression temporarily holds in the water.
In this collection basin, rainwater can percolate into the ground rather than run off. The basin is planted with deep-rooted plants that drink up the excess water.
Using soil and plants is nature’s way of slowing and filtering rainwater. It mimics the earth’s natural hydrological processes. Strategically capturing stormwater, “becomes an on-site asset rather than a liability,” says Brad Lancaster, author of Rainwater Harvesting for Drylands and Beyond.
A rain garden makes perfect sense in a permaculture-designed landscape, where the focus is on working with nature and making use of available resources.
A properly built stormwater basin isn’t a wetland, nor is it a mosquito factory. As a temporary collection basin, it drains within 12-24 hours.
Ready to build your own beautiful rain garden?

Illustration from The Suburban Micro-Farm: Modern Solutions for Busy People.
Would you like to grow food in your front yard without sacrificing curb appeal? Check out my mini guide, The Permaculture Inspired Edible Landscape.

How to Build a Rain Garden in 10 Steps
#1: Location, Location, Location.
The ideal location for a rain garden is where the ground slopes away from a building. Designate a spot that is at least 10 feet away from buildings and 18 feet away from a septic drain field or the edge of a steep slope.
Conduct an infiltration test to ensure that the water will drain within 24 hours.
#2: Calculate and mark the size of the rain garden.
First, identify the size of the roof, driveway, or other surface that will divert water into the rain garden. For this exercise, I’ve used square feet as a measurement.
Note: Identify only the area of roof that deposits water into the downspout you’ve targeted for the rain garden. For example, 600 square feet of my 1,200-square-foot roof directs water into my backyard rain garden.
Second, multiply that number by .08 to get the volume in cubic feet your rain garden needs to hold in a 1-inch rain storm.
For my project, I multiplied 600 square feet by .08 to get a volume of 48 cubic feet.
Third, divide the volume by 1.1 to get the surface area in square feet.
In my example, I need to mark off an area of about 44 square feet.
The shape of your rain garden depends on your slope and the conditions of your site. A circular shape or kidney shape is the most common.
In my example, our space was long and narrow, so our garden ended up about to 4 feet wide by 11 feet long.

Rain Garden 2.0 includes two rain barrels, a walkable “creek bed”, a potted fig tree, and a bean trellis.
Learn more about this rain garden in my article Connecting Rain Barrels to a Rain Garden.
#3: Dig the depression and grade the area.
To create the depression, dig out 12 inches of soil inside the marked area. Create gentle, rounded edges on the perimeter.
Note: You’ll need some of this soil in the next step, so save it off to the side.
Once the depression is completely dug out, use a leveling device to ensure that the bottom is flat.
#4: Form a berm on the downhill side.
Because a rain garden rests on a natural slope, you’ll need a berm on the downhill side to hold the water in. Build the berm now using the soil from step three.
Note: If the remaining soil is rich topsoil, save some of it for step seven. Otherwise, disperse it elsewhere.
#5: Aerate the bottom of the bowl.
This step is more important for clay soil than other types of soil. Aerating the subsoil encourages infiltration of water and plant roots. Use a digging fork to poke holes throughout the bottom and break up any hardpan soil.
#6: Double-check the infiltration rate.
In step one, you conducted an infiltration test on your site to be sure that the water in your rain garden would drain properly. In this step, you’ll check to be sure it drains so that you haven’t created a mosquito pond or a human health risk.
You’ll be sending a lot of water into this area, so it’s also important to verify that it won’t flood a nearby basement.
Fill the bowl with water all the way to the top, then start a timer. Does it drain within 24 hours? If so, proceed to step seven. If it doesn’t, you’ll need to tweak the design. Perhaps the bottom of the bowl needs more aeration or the berm needs to be reduced in height. Retest until the drainage is correct.
Consider where the overflow will go if the rain garden fills up and plan for it.
Tired of generic permaculture design advice that you can’t apply to your specific goals? If so, check out my Permaculture Design Program and get the tools and support needed to create and implement your own permaculture design.

#7: Add compost soil for planting.
Now it’s time to prepare the rain garden for planting. Add 6-9 inches of compost soil to the bowl, including any rich soil leftover from steps three and four.
#8: Plant with native perennials.
Deep-rooted prairie plants like wildflowers and grasses are perfect for a rain garden. It might seem like you should select wet-loving plants, but actually the opposite is true. While a rain garden is occasionally water-logged after a rain, in general, it will be dry.
That’s why prairie plants are perfect for this application. Their deep roots drink up the excess water during rainy periods. During dry periods, those deep roots help locate stores of water deeper in the soil.
Some of my favorite rain garden plants are yarrow and echinacea, and a few edible perennials for wet soil.

My front yard rain garden is planted with deep-rooted perennials like iris (with grass-like leaves) and pink coneflower.
Kale and other annual crops grow on the exterior of the rain garden berm above, where they don’t come into direct contact with the runoff. Learn more about this rain garden in my article about my Front Yard Rainwater Catchment.
#9: Mulch well.
Mulching helps protect your new plants and keeps the surface moist in between rains. Shredded leaves and wood chips are a couple of my favorite mulches, but there are many types of mulch for the permaculture garden.
#10: Direct the water source to the garden.
Your rain garden is all set up and ready to officially collect water from your source! This could mean simply directing the downspout toward the rain garden. A length of PVC pipe can extend the downspout to the right spot if needed.
It might mean digging a small trench to direct the water. Lining a trench with flat rocks can help prevent erosion.
Rain Gardens: Read Next
Rain gardens capture water and prevent runoff. But they have a number of other benefits to the permaculture garden where the goal is to use free water for irrigation.
One way to use free water is to first capture water in rain barrels and then send the overflow into a rain garden. This is what we did in our backyard.
Another way to capture free water is to first capture water in a swale, and then send the overflow into a rain garden. This is what we did in our front yard.
Whether you intend to use the water for your garden or you just want to take responsibility for the runoff on your property, rain gardens make a beautiful addition to a landscape.
What strategies have you used to capture runoff?